


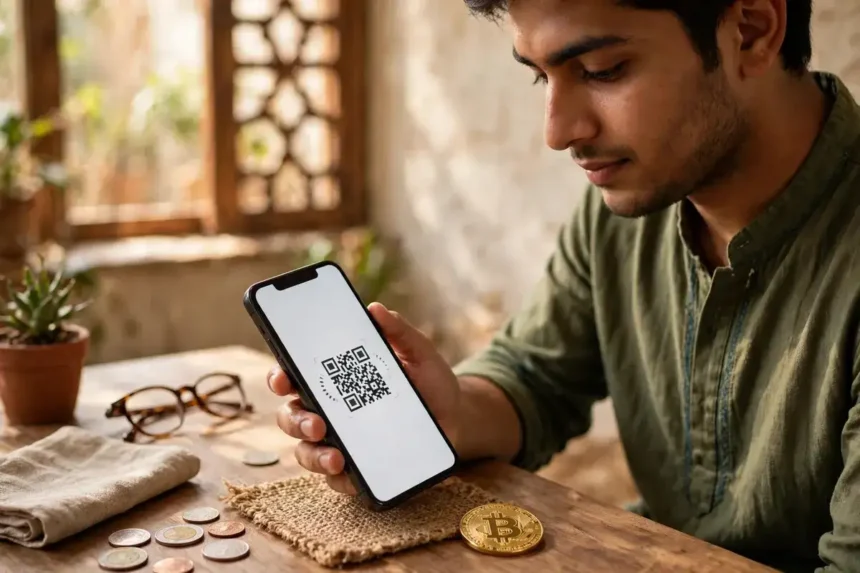
Yes, you can buy Bitcoin with UPI in India, and the fastest route is a direct UPI deposit on an FIU-registered Indian exchange. You deposit rupees from your bank account through Google Pay, PhonePe, Paytm or BHIM, then you buy Bitcoin with that rupee balance inside the exchange app.
UPI itself never sells you Bitcoin. It only moves your rupees instantly from your bank account to the exchange, and that distinction decides which route you should pick.

Key takeaways
- Direct UPI deposit on an Indian exchange is the simplest route for beginners, and deposits usually land in seconds.
- UPI-based P2P on an offshore exchange buys USDT first, then Bitcoin, and it carries seller risk that direct deposits do not.
- Most Indian exchanges start at about 100 rupees, and UPI deposits on them currently carry no platform fee.
- India taxes Bitcoin gains at a flat 30 percent plus cess, with 1 percent TDS on qualifying transfers.
- Never write “crypto”, “USDT” or an exchange name in a UPI payment remark on a P2P trade.
What UPI actually does when you buy Bitcoin
UPI stands for Unified Payments Interface, and NPCI runs it as an instant bank-to-bank payment system. You approve a payment with your UPI PIN, and the money leaves your bank account at once.
- Key takeaways
- What UPI actually does when you buy Bitcoin
- The two UPI routes, compared
- Worked example: what 10,000 rupees actually buys
- Route 1: direct UPI deposit, step by step
- Step 1: pick an FIU-registered Indian exchange
- Step 2: complete KYC with PAN and Aadhaar
- Step 3: deposit rupees with UPI
- Step 4: buy Bitcoin with your rupee balance
- Step 5: move your Bitcoin to your own wallet
- Route 2: UPI-based P2P, step by step
- Step 1: filter for verified sellers only
- Step 2: place the order and pay inside the time window
- Step 3: mark paid, then wait for release
- The P2P safety rules that prevent most losses
- Fees, limits and the October 2026 UPI charge change
- NPCI limits that shape every UPI Bitcoin buy
- Tax on Bitcoin bought with UPI in India
- When a UPI payment fails or a deposit goes missing
- Common mistakes that cost beginners money
- Frequently asked questions
- Can I buy Bitcoin directly with UPI?
- Which UPI app works best for buying Bitcoin?
- What is the minimum amount to buy Bitcoin with UPI?
- Is buying Bitcoin with UPI legal in India?
- Why did my UPI deposit fail?
- Should I use direct deposit or P2P?
- Conclusion: start direct, move to self-custody
- Sources
No UPI app holds Bitcoin for you. Google Pay and PhonePe only move the rupees, so the exchange you pick still matters more than the app you pay with.
That is why two buyers can both “pay with UPI” and have very different experiences. One deposits rupees straight into a regulated Indian exchange, while the other pays a stranger on a P2P marketplace and waits for that stranger to release coins.
The two UPI routes, compared
Every UPI Bitcoin purchase in India follows one of two paths. The table below sets them side by side, so you can pick the one that fits your first buy.
| Feature | Direct UPI deposit | UPI-based P2P |
|---|---|---|
| Where you buy | Indian exchange such as CoinDCX, CoinSwitch, Mudrex or ZebPay | Offshore exchange marketplace such as Binance or Bybit P2P |
| What you buy first | Bitcoin directly with rupees | USDT from a seller, then Bitcoin |
| Typical speed | Seconds to a few minutes | About 5 to 30 minutes per trade |
| Deposit fee | Usually free on Indian exchanges | No platform fee, but the seller charges a spread |
| Typical extra cost | Spot trading fee, often around 0.1 to 0.5 percent | Seller premium, often around 0.5 to 1.2 percent |
| Main risk | Exchange holds your coins until you withdraw them | Seller delay, wrong details, or a payment dispute |
| Tax handling | Exchange deducts 1 percent TDS automatically | You must check your own TDS duty with a tax adviser |
Beginners should start with the direct route. It has fewer moving parts, the tax paperwork is simpler, and you never negotiate with a stranger over chat.

P2P suits buyers who already hold an offshore account and want a specific coin or a larger order book. It still works well, but only if you follow the escrow rules in the P2P section below.
Worked example: what 10,000 rupees actually buys
Fees change, so treat these figures as a November 2026 illustration, not a quote. The point is the gap between the two routes, and that gap repeats at any amount.
| Route | Deposit | Cost to convert | Bitcoin value received |
|---|---|---|---|
| Direct UPI deposit | 10,000 rupees, no deposit fee | About 10 rupees at a 0.1 percent spot fee | About 9,990 rupees of Bitcoin before any spread |
| UPI P2P to USDT, then Bitcoin | 10,000 rupees to a seller | About 50 to 120 rupees in seller premium, plus a spot fee | About 9,870 to 9,940 rupees of Bitcoin |
The P2P route can still win on a specific day if one seller posts a tight price. Check both screens before you pay, and never assume the route you used last month is still the cheaper one.
Route 1: direct UPI deposit, step by step
This route has five steps, and the whole process usually takes under half an hour once your KYC is approved. Keep your PAN card and Aadhaar card ready before you start.
Step 1: pick an FIU-registered Indian exchange
Choose an exchange that states FIU-IND registration and supports direct UPI deposits. CoinDCX, CoinSwitch, Mudrex and ZebPay all fit that description, and our payment methods hub compares them with other ways to fund a purchase.
Check one more feature before you sign up: whether the exchange lets you withdraw Bitcoin to your own wallet. CoinDCX supports external crypto withdrawals, while CoinSwitch does not, and that difference matters the moment you want self-custody.
Step 2: complete KYC with PAN and Aadhaar
Indian exchanges must verify your identity before they accept a deposit. You will upload your PAN card and Aadhaar card, take a selfie, and confirm your bank account details.
Automated checks often clear within minutes, but some accounts take a few hours. Do not deposit money until the app shows your KYC as approved, because an unverified account can freeze your funds in review.
Step 3: deposit rupees with UPI
Open the Funds or Wallet section, tap Add Money or Deposit, and choose UPI. Enter the amount, pick your UPI app, and approve the payment with your UPI PIN.
Most Indian exchanges accept deposits from about 100 rupees, and the money usually appears in seconds. Your bank account name must match your exchange profile name, or the deposit can fail or stall in review.
Use your own bank account only. Deposits from a friend or family member account often get rejected, and the refund can take days.
Step 4: buy Bitcoin with your rupee balance
Search for BTC on the coin page, tap Buy, and enter the rupee amount. A market order buys at the current price at once, while a limit order waits for your chosen price.
You never need to buy a whole Bitcoin. On 12 October 2026, Mudrex listed about 82.5 lakh rupees for one Bitcoin, so 10,000 rupees bought roughly 0.0012 Bitcoin at that price.
Read the confirmation screen before you swipe or tap confirm. It shows the price, the fee, and the exact Bitcoin amount, and that screen is your last chance to catch a typo in the amount.
Step 5: move your Bitcoin to your own wallet
Bitcoin left on an exchange sits under the exchange’s control. Copy your own wallet address, paste it into the withdrawal screen, and send a small test amount first.
Our Sparrow wallet guide walks through free self-custody in seven steps. If you plan to hold for months, that move matters more than shaving a few rupees off the trading fee.
Route 2: UPI-based P2P, step by step
P2P means you buy from another person, not from the exchange itself. The platform only holds the seller’s coins in escrow and releases them once the seller confirms your payment.
Start with USDT, not Bitcoin, because USDT has the deepest P2P liquidity. You can trade USDT for Bitcoin on the same platform once the seller releases it.
Step 1: filter for verified sellers only
Open P2P trading, set fiat to INR and payment method to UPI, then filter for verified merchants. Pick sellers with a completion rate above 98 percent and hundreds of completed orders.
A slightly higher price from a proven seller beats a bargain price from a new account. One failed trade can cost you more time than the premium ever would.
Step 2: place the order and pay inside the time window
Enter the exact amount and start the trade, which locks the seller’s USDT in escrow. Pay through your UPI app within the window shown, usually 15 minutes, and use only the UPI ID shown in the order.
Never pay before you start the order, and never pay an amount different from the order total. Escrow only protects the exact trade you opened, and side payments fall outside it.
Step 3: mark paid, then wait for release
Tap the button that says you transferred the money, then wait for the seller to confirm receipt. The USDT lands in your funding wallet, and you can then trade it for Bitcoin on the spot market.
If the seller does not release the coins, do not cancel in a panic. Open a dispute with your UPI transaction screenshot, and let the platform decide from the payment proof.
The P2P safety rules that prevent most losses
Never write “crypto”, “USDT”, “Bitcoin” or an exchange name in the UPI remarks field. Banks can flag or freeze payments that mention crypto, and a flagged payment can trap both your money and the trade.
Never chat with the seller outside the platform, and never accept a “faster” deal over WhatsApp or Telegram. Scammers copy real seller profiles, then collect UPI payments for trades that never existed.
Never release escrow early, and never confirm receipt before the coins reach your wallet. The platform cannot reverse a release you confirmed yourself.
Fees, limits and the October 2026 UPI charge change
UPI deposits on Indian exchanges currently carry no platform fee, and that has not changed for customers. What changed on 15 October 2026 sits on the merchant side, not yours.
From that date, a 0.4 percent merchant discount rate applies to eligible person-to-merchant UPI payments above 2,000 rupees, capped at 300 rupees per transaction. The Finance Ministry has said merchants and UPI apps must not pass that charge to customers, and Indian exchanges have absorbed it so far.
Watch your deposit screen anyway. Policies can change, and the amount credited is the only figure that counts, whatever a blog post promised.
NPCI limits that shape every UPI Bitcoin buy
NPCI sets a standard ceiling of 1 lakh rupees per transaction and per day for ordinary person-to-person and person-to-merchant payments. Most banks also cap you at 20 UPI transactions per day, and the window rolls over 24 hours from your first payment, not at midnight.
Your bank can set a lower limit, but it cannot raise the NPCI ceiling. New UPI users also face a 5,000 rupee cap in their first 24 hours, so a large first buy can fail even when your balance covers it.
| Limit | Standard figure | What it means for you |
|---|---|---|
| Per transaction | 1 lakh rupees | Split larger buys across days or use a bank transfer |
| Per day, all apps combined | 1 lakh rupees | Payments on Google Pay and PhonePe share one cap |
| Transactions per day | 20 | Small repeated deposits can hit the count cap first |
| New user, first 24 hours | 5,000 rupees | Start small on a brand new UPI ID |
If your buy exceeds the UPI ceiling, a bank transfer through IMPS or NEFT usually clears the same day. Treat the UPI cap as a planning limit, not a reason to rush a trade.
Tax on Bitcoin bought with UPI in India
India taxes Bitcoin as a virtual digital asset, and the payment method changes nothing about the tax. UPI only moves the money, while the tax rules attach to the Bitcoin trade itself.
Gains from selling or swapping Bitcoin face a flat 30 percent tax plus cess, whatever your income slab or holding period. Only the purchase cost counts as a deduction, and losses cannot offset other gains or carry forward to later years.
A 1 percent TDS also applies to qualifying transfers, above an annual threshold of 50,000 rupees for most individuals. Domestic exchanges deduct it automatically and show it in your tax statement, so you claim it as credit when you file.
P2P buyers face a messier picture, because no Indian exchange deducts TDS on an offshore trade. Ask a chartered accountant about your TDS duty before you build a large P2P position, and keep every UPI receipt as proof.
Report all trades in Schedule VDA of your income tax return, even losing ones. Our India guide covers the wider legal picture, and tax rules can change in any Budget, so recheck them before you file.
When a UPI payment fails or a deposit goes missing
Most failed deposits trace back to a simple mismatch, not a broken system. Work through the checks in order, and do not send a second payment until you know what happened to the first.
- Wrong bank account name: your bank name must match your exchange profile exactly, including spelling and order.
- Wrong UPI ID on P2P: pay only the ID shown inside the order, and double-check the final character before you approve.
- Payment succeeded, deposit missing: wait 30 minutes, then raise a ticket with your UPI transaction ID and a screenshot.
- Payment pending in the bank app: do not retry at once, because a pending payment can still settle and double your deposit.
- Crypto word in the remark: a flagged P2P payment can freeze, so use a neutral remark and let the platform dispute run.
Save every transaction ID and screenshot until the coins land. A dispute without proof moves slowly, and a dispute with proof usually resolves in days.
Common mistakes that cost beginners money
The most expensive mistake is sending Bitcoin to the wrong address, because that transfer cannot be undone. Copy the address, paste it, and check the first and last four characters before you send anything.
The second mistake is trading on leverage before you understand spot buying. Leverage can wipe out a small account in one volatile hour, while a simple spot buy only moves with the Bitcoin price.
The third mistake is buying in a panic after a price spike, then selling in a panic after a dip. Set a fixed monthly amount instead, and let the plan, not the chart, decide your next buy.
Read our beginner wallet guide before your first withdrawal, and compare it with our Google Pay guide and our Neosurf guide if you want a second funding route.
Frequently asked questions
Can I buy Bitcoin directly with UPI?
Yes, on an FIU-registered Indian exchange. You deposit rupees with UPI, then you buy Bitcoin with that rupee balance inside the app.
Which UPI app works best for buying Bitcoin?
Google Pay, PhonePe, Paytm and BHIM all work for deposits on Indian exchanges. Pick the app already linked to the bank account that matches your exchange profile.
What is the minimum amount to buy Bitcoin with UPI?
Most Indian exchanges accept deposits from about 100 rupees. You can buy a fraction of a Bitcoin, so the minimum depends on the exchange, not on the price of one whole coin.
Is buying Bitcoin with UPI legal in India?
Buying Bitcoin is not banned in India, and the government taxes it as a virtual digital asset. Use an FIU-registered exchange, keep your tax records, and check the latest rules before a large purchase.
Why did my UPI deposit fail?
Common causes include a name mismatch between bank and exchange, a new UPI ID under its 5,000 rupee first-day cap, or a daily limit already reached. Check the name, the cap and the transaction count, then retry or use a bank transfer.
Should I use direct deposit or P2P?
Use direct deposit for your first buys, because it is faster, simpler and handled by one exchange. Use P2P only once you understand escrow, seller ratings and the remark rules.
Conclusion: start direct, move to self-custody
Direct UPI deposit wins for beginners in India. It is instant, it starts at about 100 rupees, the exchange handles the TDS, and you never negotiate with a stranger over chat.
Learn P2P later if you want offshore liquidity or a coin your Indian exchange lacks. Keep the escrow rules tight, keep crypto words out of your remarks, and keep your tax records from the first trade.
Your next step is simple: pick an FIU-registered exchange, finish KYC, deposit a small test amount with UPI, and buy a fraction of a Bitcoin. Then move it to your own wallet, and you will have completed the full loop that most beginners never finish.